


Introduction
Retrofit is a widely used networking library for Android app development. It’s developed by Square and designed to make it easier to retrieve and send data between a mobile app and a RESTful web service.
let’s jump into the details.
Retrofit Methods(GET, POST, PUT, FETCH, DELETE)
First of all, let’s learn about the methods.
1. GET Request:
The GET method is used to retrieve data from the server. It is a read-only operation, meaning it doesn’t modify any data on the server.
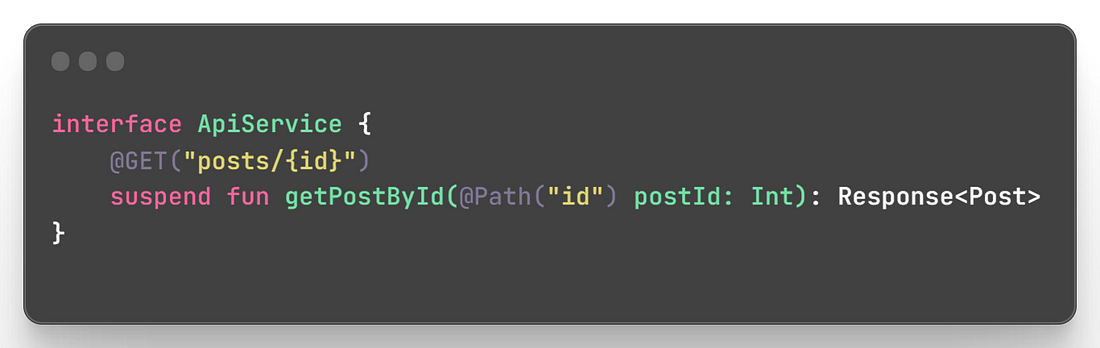
Example: In this example, we use the @GET annotation to define a GET request to fetch a specific post by its ID. The {id} part in the URL is a placeholder for the postId parameter, which will be replaced with the actual ID when the request is made.
2. POST Request:
The POST method is used to submit data to the server, typically to create new resources.
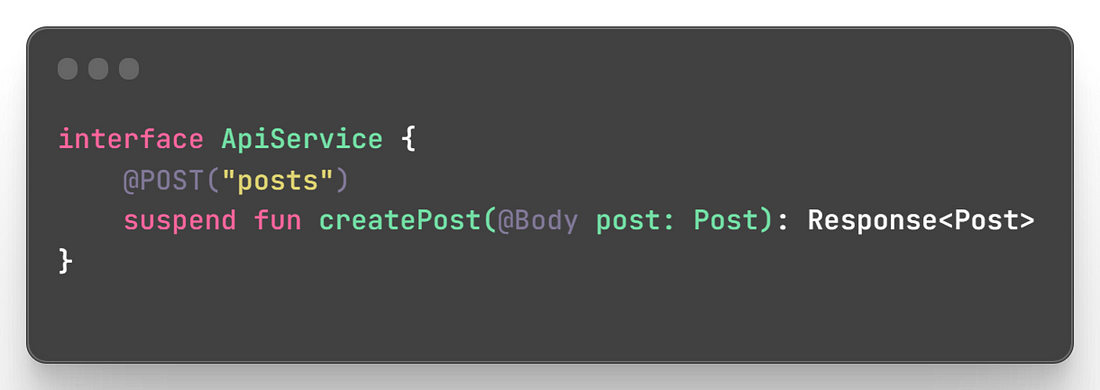
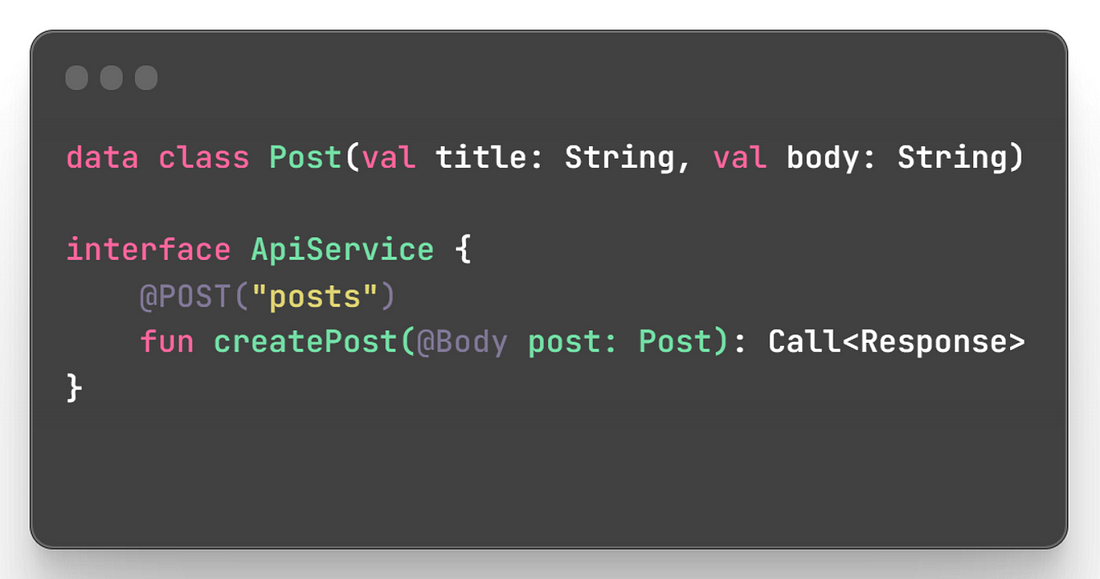
Example: In this example, we use the @POST annotation to define a POST request to create a new post. The @Body annotation is used to specify that the post object should be serialized as the request body.
3. PUT and PATCH Request:
The PUT and PATCH methods are used to update data on the server. PUT is used to update the entire resource, while PATCH is used to make partial updates.
Example: In this example, we use the @PUT and @PATCH annotations to define PUT and PATCH requests, respectively. The @Body annotation is used to specify the data to be sent in the request body.

4. DELETE Request:
The DELETE method is used to delete data on the server.
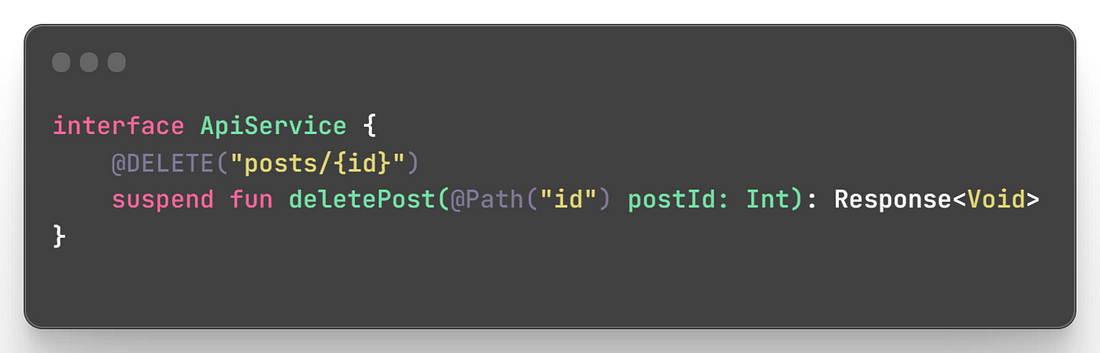
Example: In this example, we use the @DELETE annotation to define a DELETE request to delete a post with a specific ID.
Retrofit Annotations (Path, Body, Field, Part, Header, HeaderMap, Query, FormUrlEncoded, Multipart)
Now let’s learn about the annotations.
1. @Path :
Used to replace dynamic parts of the URL with the specified parameter.
It is typically used when you have a part of the URL that varies based on the input.
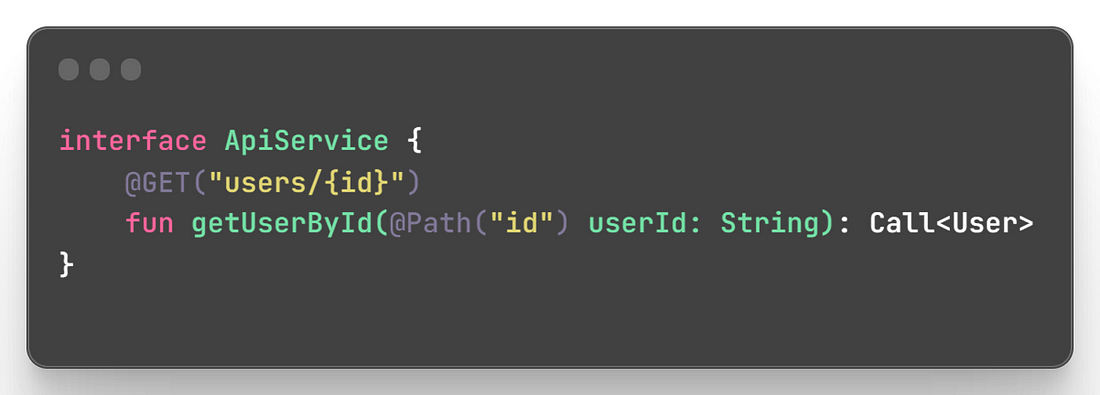
Example: In this example, the {id} part of the URL will be replaced with the value provided as the userId parameter.
2. @Body :
@body is used to send data in the request body. Mainly used for POST, PUT, and PATCH requests.
The data can be serialized from an object to the desired format (e.g., JSON) using a converter.
Example: In this example, we send a Post object as the request body in a POST request.
3. @Field and @FormUrlEncoded :
Used for sending form-encoded data (key-value pairs) in the request body.
Typically used when working with HTML forms or APIs that expect form data.
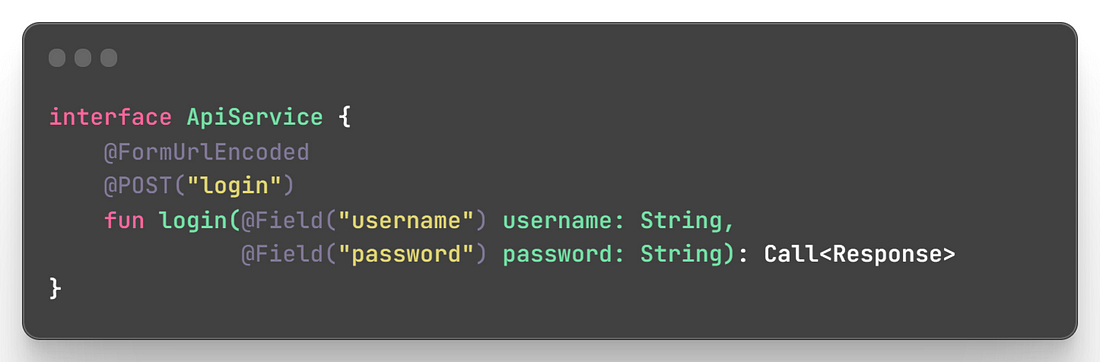
The @FormUrlEncoded annotation is applied to the method to indicate form-encoded data.
Example: In this example, we send username and password as form fields in a POST request.
4. @Part and @Multipart :
Used for sending binary data (e.g., images or files) in the request body.
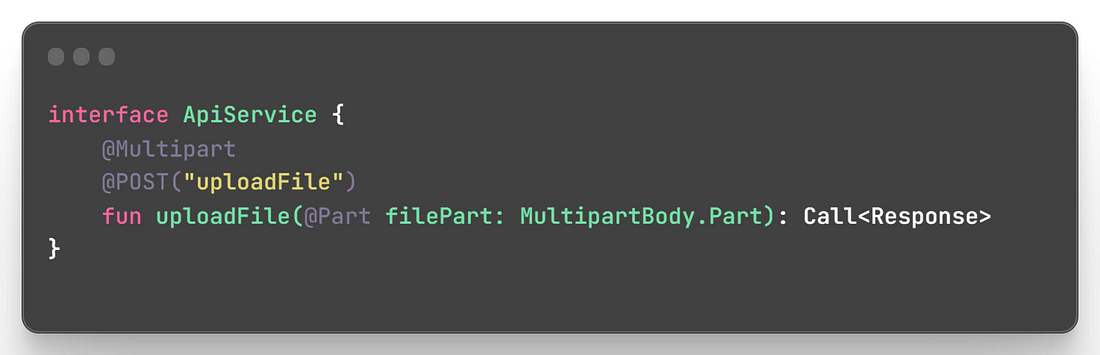
The @Multipart annotation is applied to the method to indicate that the request will contain multipart data.
Example: In this example, we send a MultipartBody.Part representing the file in a multipart POST request.
5. @Header :
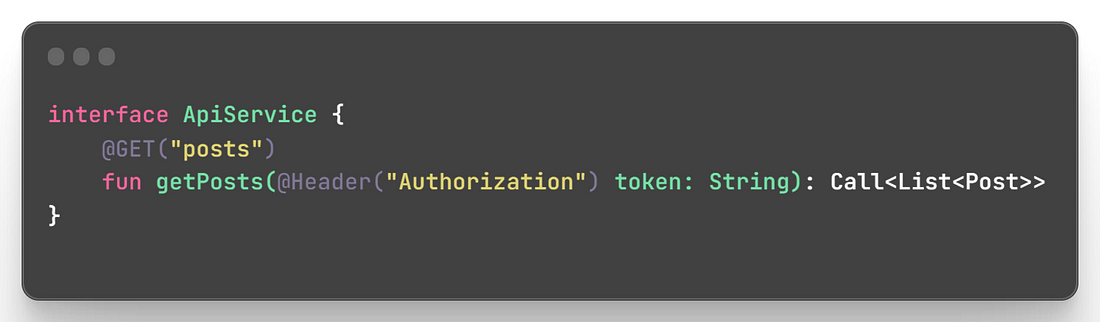
Used to add a static header to the request.
Example: In this example, we send an Authorization header with the specified token value in the request.
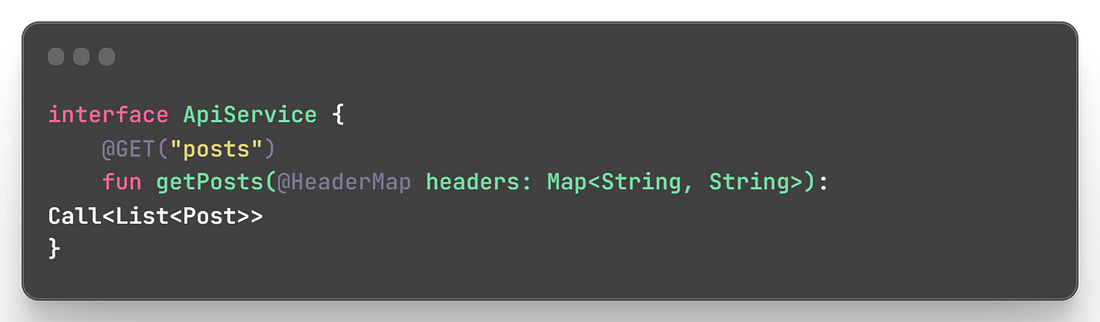
6. @HeaderMap :
Used to add multiple static headers to the request using a map.
Example: In this example, we send multiple headers as specified in the headers map.
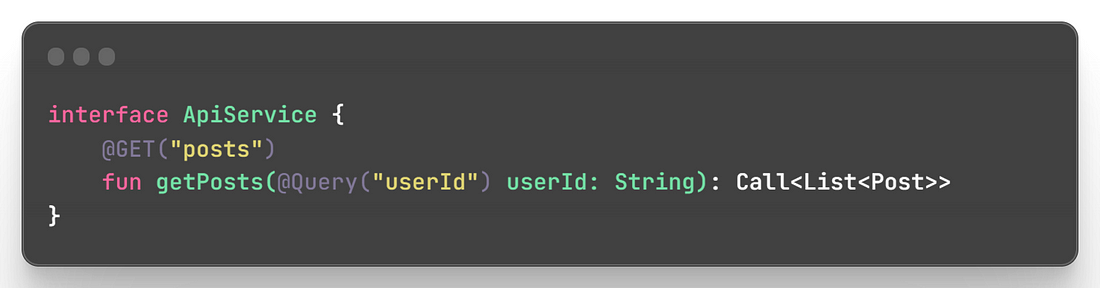
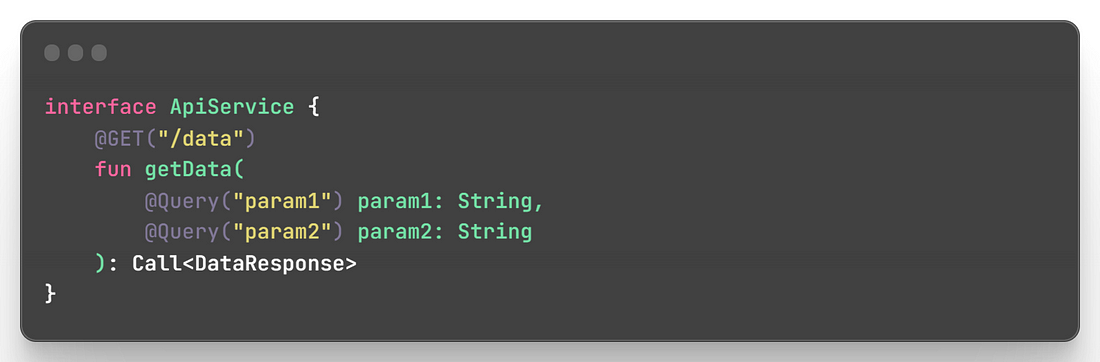
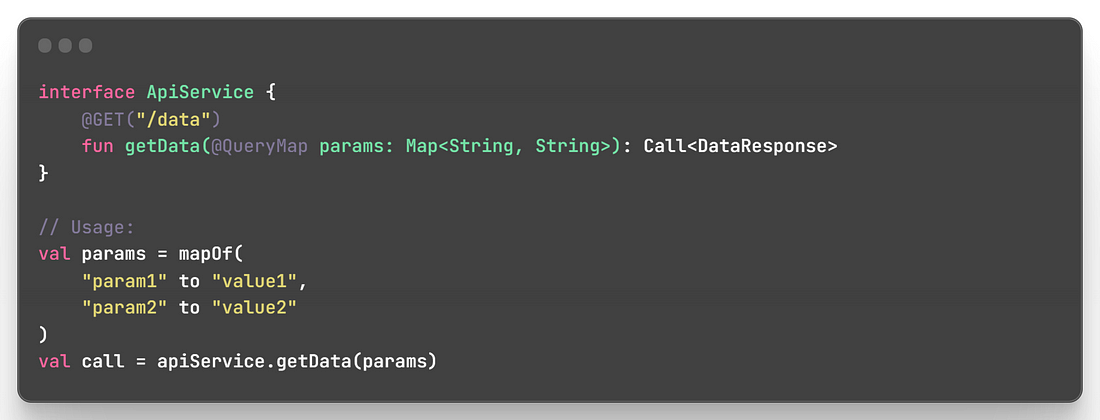
7. @Query :
Used to add query parameters to the URL.
Example: In this example, we add the userId query parameter to the URL.
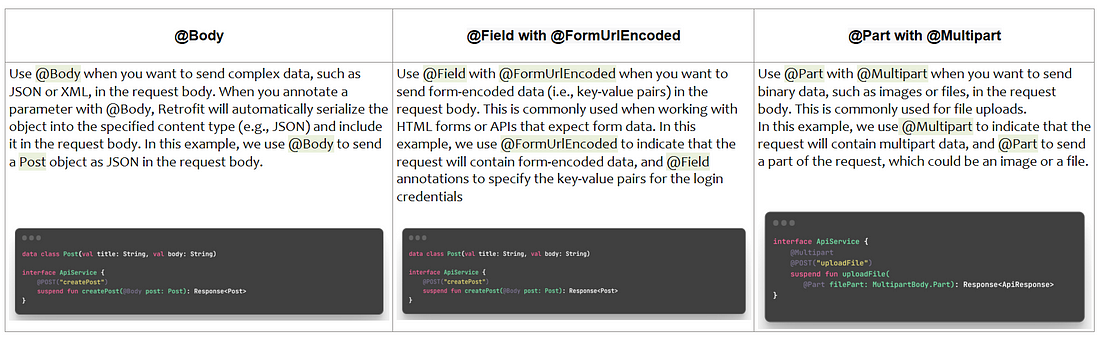
8. @Body vs @Field vs @Part:
Use @Body for sending complex data (e.g., JSON or XML) in the request body.
Use @Field with @FormUrlEncoded for sending form-encoded data (key-value pairs) in the request body.
Use @Part with @Multipart for sending binary data (e.g., images or files) in the request body.
Important: For the GET method, query parameters are typically added to the URL as part of the request, not in the request body (you cannot use the @Body or @Field annotations with the GET method in Retrofit for sending data. @Body and @Field methods are specially designed for POST and PUT methods) you can use the @Query or @QueryMap annotations to include query parameters in the URL.
Implementing Retrofit
Now let’s see, how we can implement retrofit
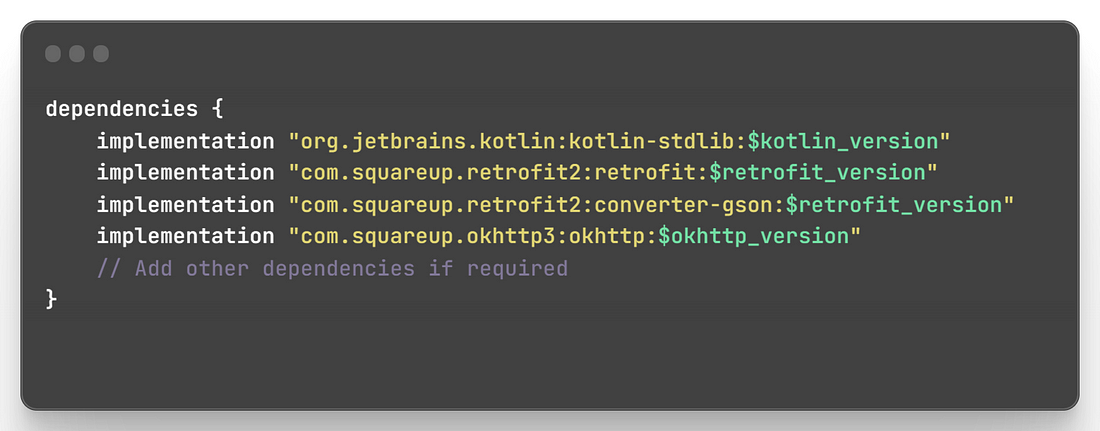
Step 1: Add Dependencies:
Add the necessary dependencies to your project's build.gradle file
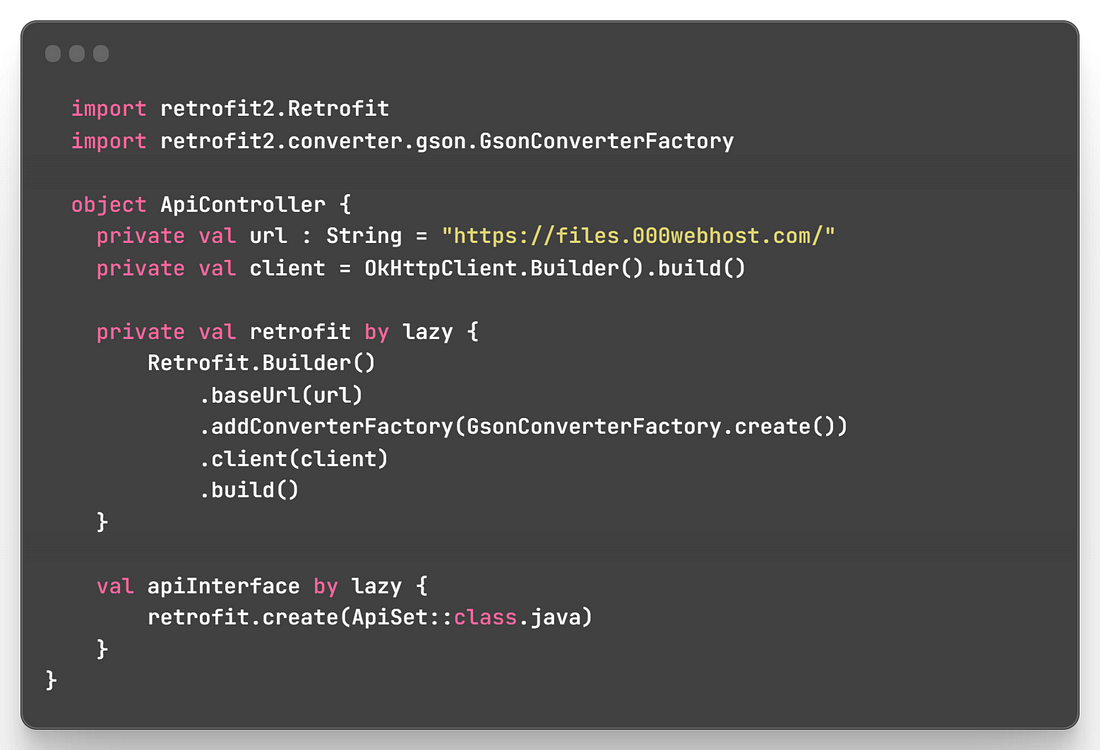
Step 2: Create a Retrofit Instance
Create a Retrofit instance with the desired base URL and other configuration options.
Step 3: Define API endpoint
Create an interface that defines the API endpoints.

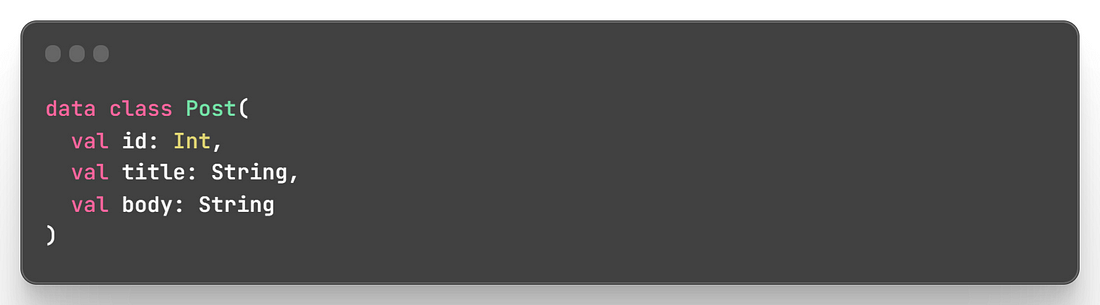
Step 4: Model Class
Create a data class representing the data you expect from the API.
Step 5: Make Network Request
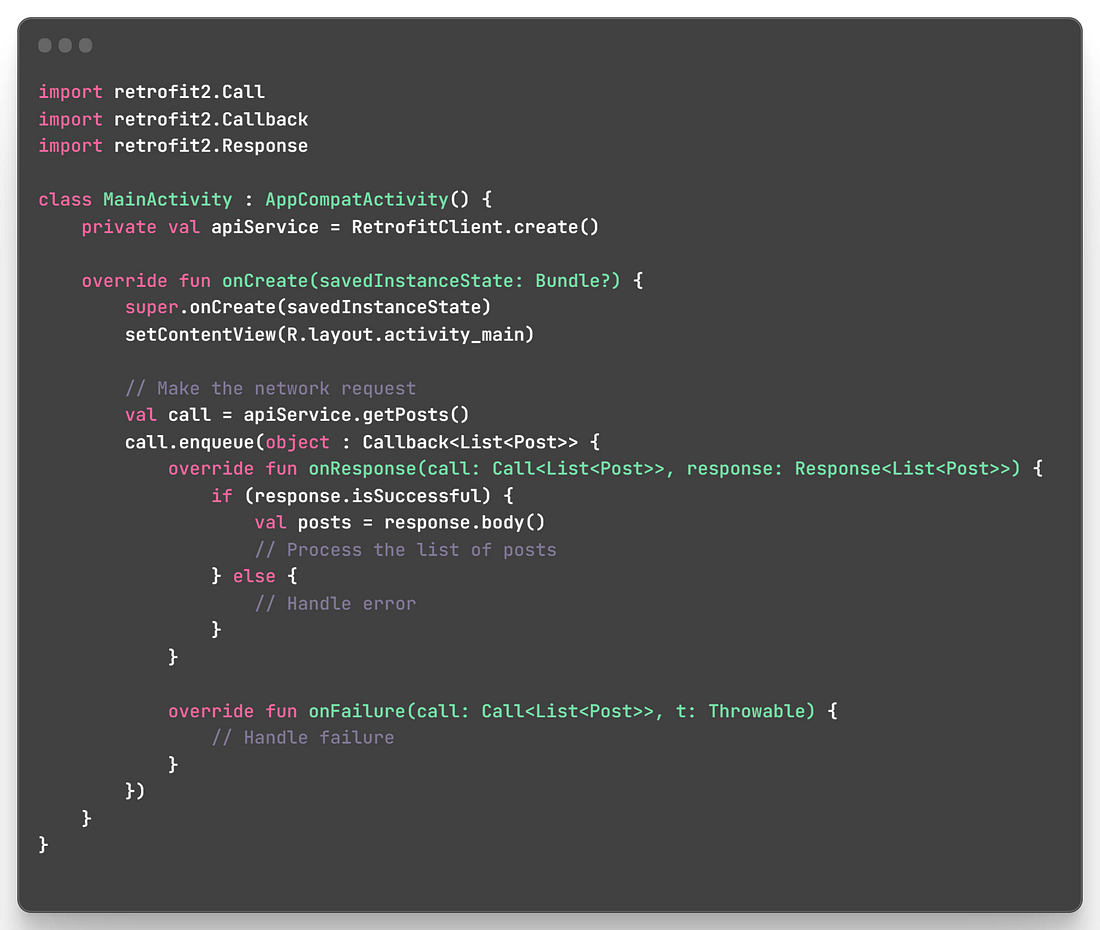
In your activity or fragment, make a network request using the ApiService and handle the response.
In this example, we make a GET request to retrieve a list of Post objects from the API. The response is handled asynchronously using the enqueue method, which executes the request on a background thread and delivers the result on the main thread.
Implementing Retrofit with Kotlin-Coroutine
4 different methods to use coroutine on retrofit.
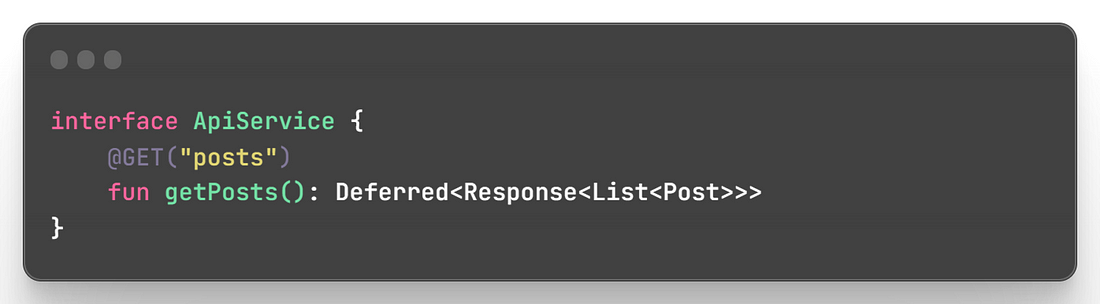
1. Deferred with CoroutineCallAdapterFactory:
In this approach, you use Deferred as the return type in API service methods.
Retrofit’s CoroutineCallAdapterFactory is added to the Retrofit instance to handle Deferred responses.
You call .await() on the Deferred object to suspend the coroutine and wait for the result.
The coroutine launches on a specific dispatcher (e.g., IO dispatcher) to execute the network request in a background thread.
Example:
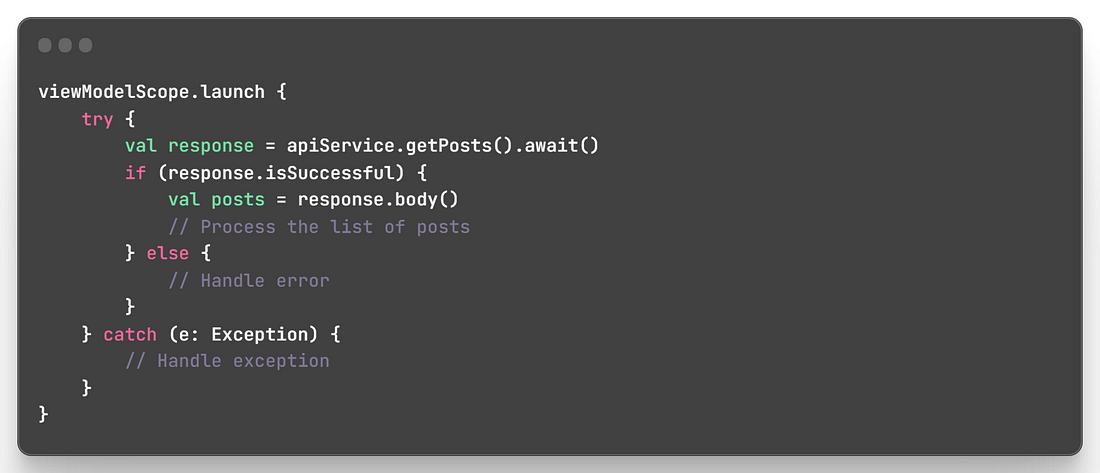
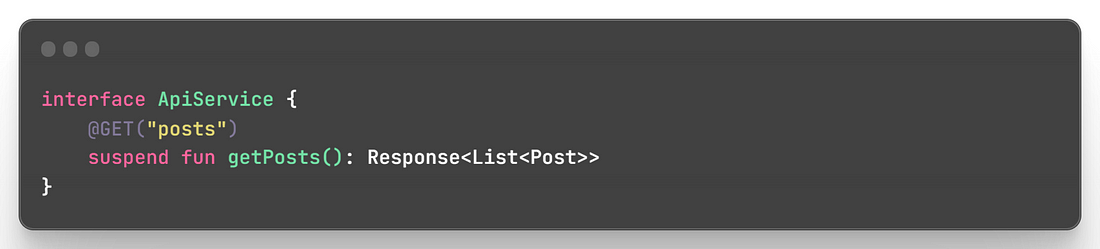
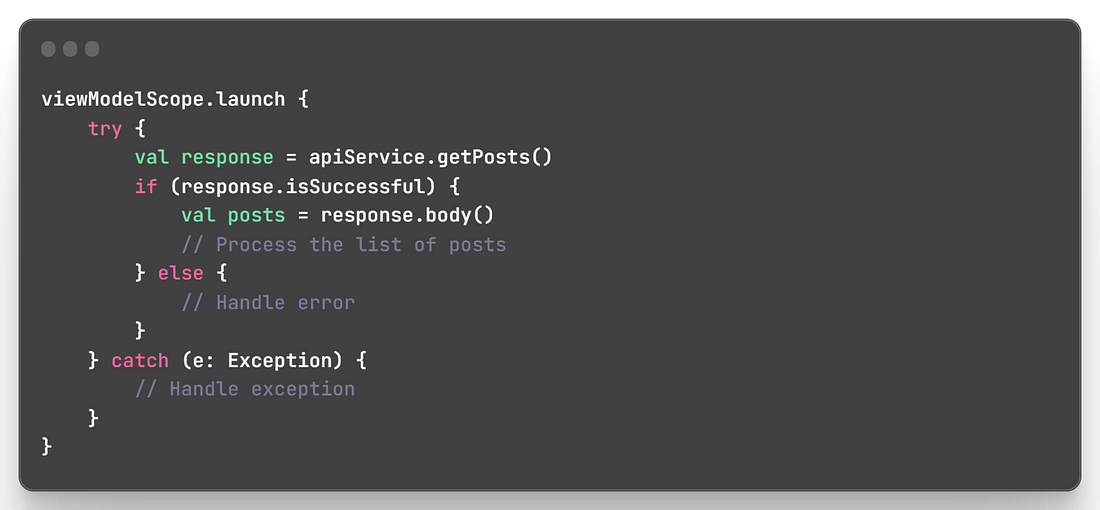
2. suspend Functions without Deferred:
In this approach, you define API service methods as suspend functions directly (without using Deferred).
Retrofit’s default CallAdapterFactory automatically handles coroutines for these suspend functions.
The coroutine launches on a specific dispatcher (e.g., IO dispatcher) automatically.
Example:
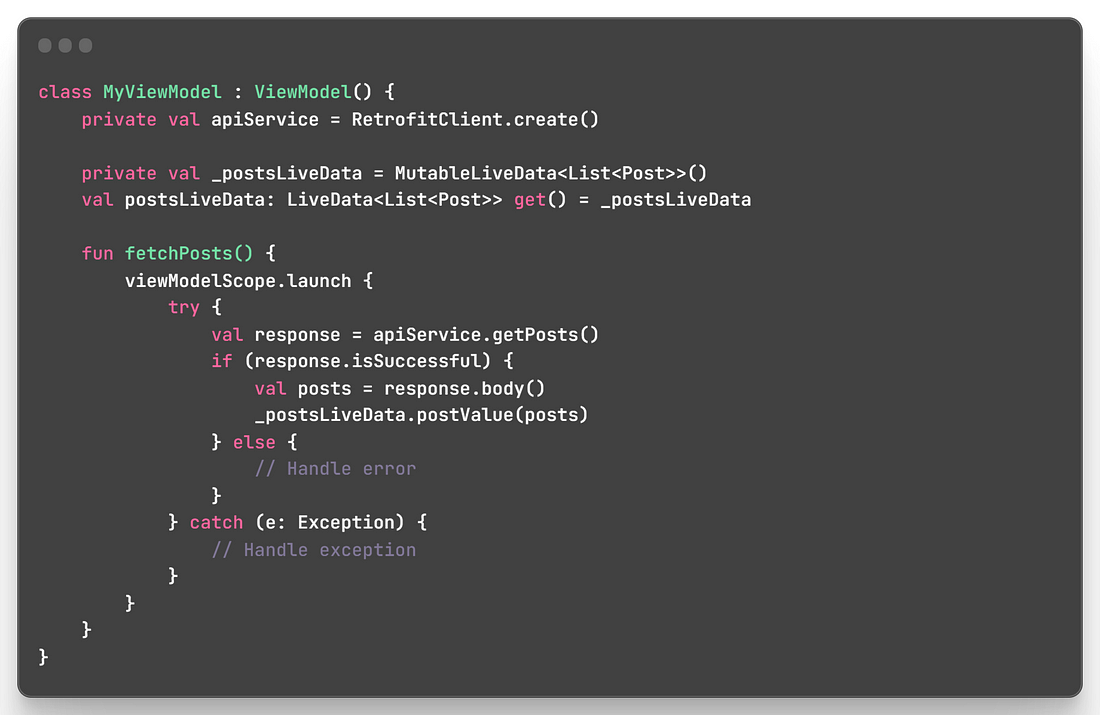
3. ViewModel with LiveData:
This approach uses LiveData to expose the API results to your UI.
Combine Retrofit with coroutines inside a ViewModel.
Use viewModelScope.launch to launch a coroutine in the ViewModel’s scope (e.g., viewModelScope).
This allows you to make network requests within the ViewModel in a coroutine context.
The results are stored in a LiveData object, which can be observed by your UI components.
Example: In this case, you can observe postsLiveData in your UI components to get real-time updates when the data is available.
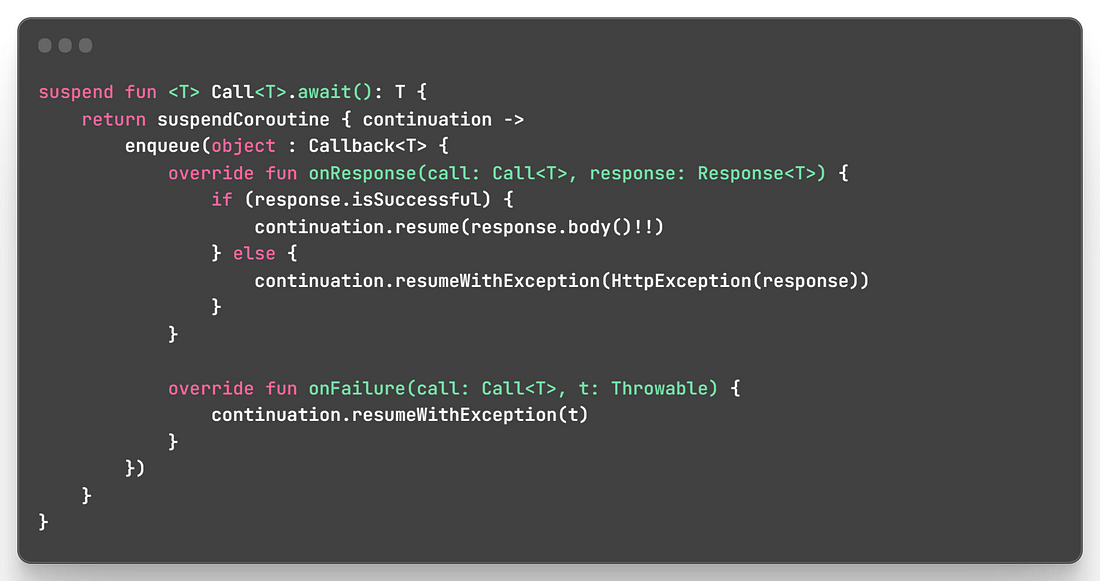
4. Coroutine Extensions:
This approach involves creating an extension function to handle Retrofit’s Call as a coroutine.
The extension function wraps the Call in a coroutine-suspendable way using suspendCoroutine.
You call the extension function to execute the network request as a coroutine without using Deferred.
The coroutine launches on a specific dispatcher (e.g., IO dispatcher) automatically.
Example:
Bonus Tip
In the context of API design for user authentication, Login involves verifying a user’s credentials and establishing a session providing their information to the system. This information typically includes things like a username or email and password. The HTTP method @POST is commonly used for login operations. Because, the @POST method allows the user's credentials (username and password) to be sent in the request body, keeping them hidden from the URL and potentially encrypted, which enhances security.
Both signup and login require sending data to the server. Since the data involve sensitive information, the data is sent in the request body, which is a more appropriate and secure way than embedding it in the URL (as @GET requests do).
Besides, Login typically involves server-side operations to verify the credentials against a database or authentication service. @POST allows for more complex operations and data handling on the server side.